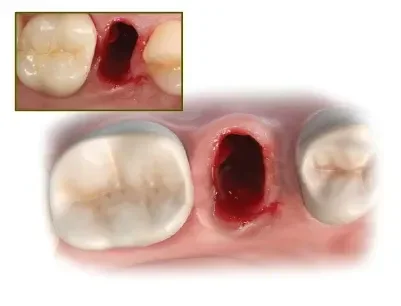
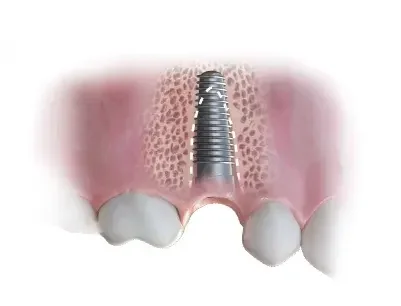
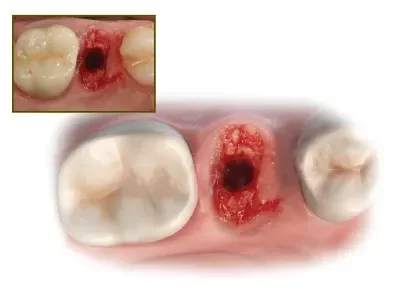
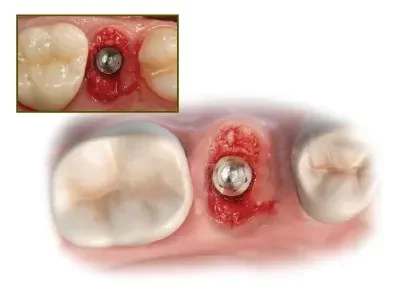
Immediate Implant Placement

• ATRAUMATIC TOOTH EXTRACTION WITHOUT OR MINIMAL FLAP REFLECTION.
• CHOOSE IMPLANT DIAMETER TO BE SLIGHTLY WIDER THAN THE TOOTH APEX.
• USE DENSAH BURS IN FULL INCREMENTS AND CCW OSSEODENSIFICATION MODE.
• FINAL DENSAH BUR APICAL DIAMETER TO BE TO THE APICAL DIAMETER OF TOOTH APEX.
• USE A WELL HYDRATED COMPOSITE ALLOGRAFT OF 70/30 CANCELLOUS//CORTICAL TO FILL THE SOCKET.
• USE DENSAH BUR THAT IS ONE STEP SMALLER THAN THE LAST USED BUR TO DENSIFY ALLOGRAFT.
• IMPLANT STABILITY MUST BE MAINLY PROVIDED BY THE APICAL PORTION OF THE SOCKET.

Step 1:

After atraumatic tooth extraction without or minimal flap reflection and
socket degranulation, use the pilot drill in clockwise mode to achieve implant
trajectory.

Step 2a:

Choose implant diameter based on the tooth or its socket apical diameter.
Implant needs to be slightly wider than the tooth apex. This will allow the
Implant stability to be mainly provided by the apical portion of the socket.

Step 3:

Use Densah Burs in full increments, depending upon the implant type and
diameter. After the pilot osteotomy, change the surgical motor to Densifying
Mode (ccw, 800-1500 rpm with copious irrigation). To prep the site, start with
the narrowest Densah Bur, in OD Mode, until reaching the desired depth
(begin by introducing the running bur into the osteotomy.) When feeling the
haptic feedback of the bur pushing up out of the osteotomy, lift off and reapply
pressure with a pumping motion until reaching the desired depth. Use the
following wider Densah Burs until reaching the designated bur in Step 2B. As the bur diameter increases, the apical bone will slowly expand to
accommodate the designated implant diameter.

Step 4:

Loosely fill the osteotomy with well hydrated allograft in the socket.
Allograft preferably to be a combination of 70/30 cancellous/cortical.

Step 5:

Densified allograft may enhance implant primary stability in the extraction
socket. Use the Densah Bur that is one step smaller than the last bur used
in socket preparation. Use the bur in ccw direction, low speed 150-200 rpm
with no irrigation to densify the allograft laterally into the socket walls. Follow
the same implant preparation trajectory.

Step 6:

Place the implant. Using the surgical motor to tap the implant into place, the
unit may stop when reaching the placement torque maximum. Finish placing
the implant to depth manually with a torque indicating wrench.